Guitar Construction
Page 1
Page 1 2 3 4
|
One 4' x 8' x 3/4" sheet of mdf is cut into 8 pieces 12" x 24" and 2 pieces that will be used for a go bar deck, 24" x 48". |
The guitar mold is used to the hold the guitar sides when the top and bottom are glued on. This is a very important step in guitar construction. Once I build the mold, it can be used to make many more guitars. I need to make sure it is perfect.
There are different ways to build guitar molds. They can even be purchased like this guitar mold.
Some people build semi-solid molds. Take a look at this web page that shows how to build one.
I want to build a solid mold from mdf (medium density fiberboard). To make a sold mold, I will start with a 4' x 8' x 3/4" sheet of mdf. I bought it at Home Depot for just under $24. I had the nice guys at Home Depot cut the mdf into 2 sheets 48" x 24". Then I had 8 sheets cut 12" x 24".
|
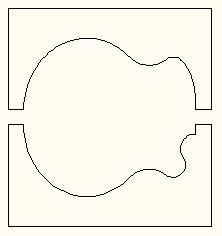
I will trace the top half and the bottom half to 12" x 24" pieces of 3/4" mdf. I will use four for each. Then I will cut just short of the line on each piece of wood. After that, I glue and clamp the wood together and when dry, sand to the line. |
|
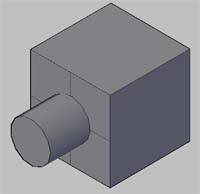
Stop blocks are aligned along the front or the back of the guitar molds to raise the guitar in the mold. We are going to need 40 of these suckers. Break out the drill press! |
Once the pieces are cut, I will take the full size drawings of the guitar and trace the top half to four of the 12" x 24" pieces and then I will do the same with the bottom half of the guitar. Then I will take each piece of mdf to the bandsaw and cut on the inside of the line I have drawn by 1/8" to 1/16". When all the pieces for the top and the bottom are cut, I will glue and clamp them together, squaring up the back of the pieces. When the glue is dry, I will use my spindle sander and sand down to the line making sure that the mold line is very smooth and precise. If you don't have a spindle sander, you can use a piece of 6" pvc pipe, eight or ten inches long, wrapped in sandpaper. There are also attachments made for drill presses that you may want to look into. The more electric tools you have, the easier your job will be.
After sanding each mold half to shape, I will attach latches on each side that will hold the mold halves together. Then I will split the mold halves and draw a line down the inside of the front half of each mold, one inch from the face. Then I will
drill ten 1/2" holes, even spaced, along that line. These holes are for stop blocks that will allow me to raise the guitar in the mold. The holes on the back side of the mold will be drilled when a side taper jig is built.
I will continue this page when I actually start building the guitar molds. |