Thickness Sander
Page 4
Page 1 2 3 4 5 6 7 8 9
|
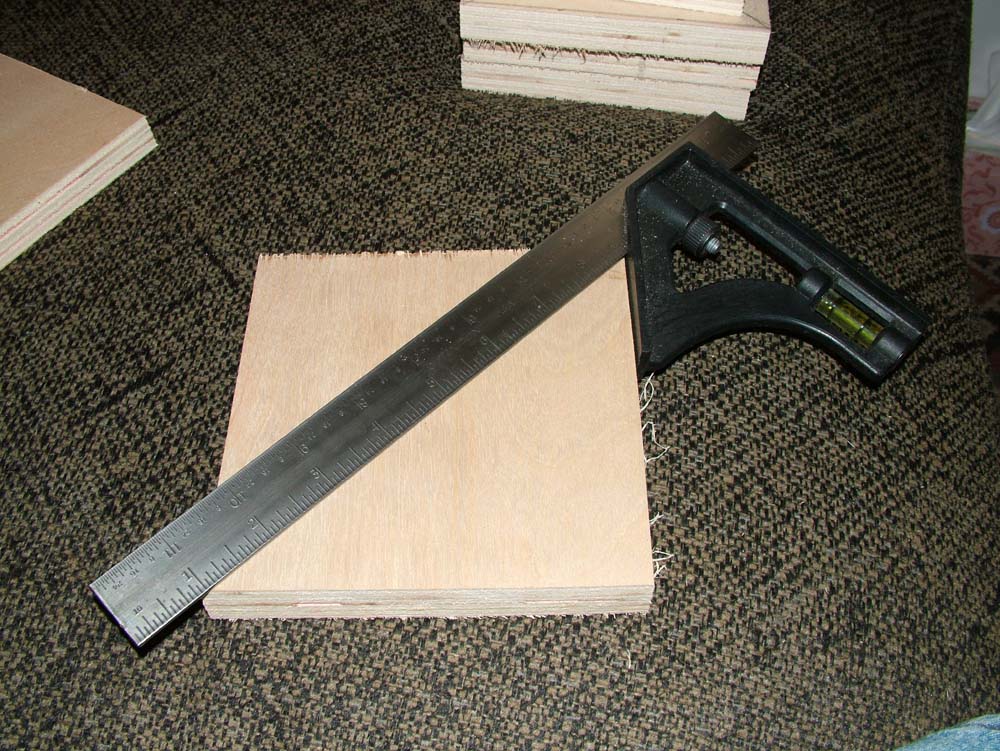
After cutting squares of 3/4" plywood 5 1/2" square, I drew a line from each corner diagonally to mark the center of each square. |
I didn't get a lot done today but I did cut the plywood for the table for the sander. The plans call for two sheets of 3/4" plywood cut to 20 1/2" x 23 5/8". Handling a large sheet of 3/4" plywood can be a chore. It is too big to cut on my bench saw so I measured about four times (forget the measure twice and cut once" rule with me). I have to measure more than that) and then cut the plywood. I used my 48" straight edge and clamped it to the plywood and then cut it with a fine kerfed blade on my skill saw. No matter how hard I try though, it seems like I can never get two cuts that are exactly the same. The plans call for glueing both pieces of wood together so they will not warp and will be very strong. The edges don't line up perfectly like I would like for them too. But, once the glue is dry, I will trim the table and it will probably only be about an eighth of an inch smaller on each side than it should have been.
I have been keeping all of the parts needed for the thickness sander and their associated costs on a spread sheet so I can see how much money I spend by the time I get it built. I have included it in case you are considering building one yourself. One of the big costs coming up is the cost of the Velcro backed 4" wide sandpaper. I will probably spend close to $100 to get one roll of course paper and one roll of fine paper. Considering what a commercially built thickness sander would cost, the amount of money I have spent is not too bad. I could have saved a little money buying cheaper plywood. Scavenging for a steel tube for the drum shaft and making a plywood pulley like shown in the plans would save some money too.
|
 |
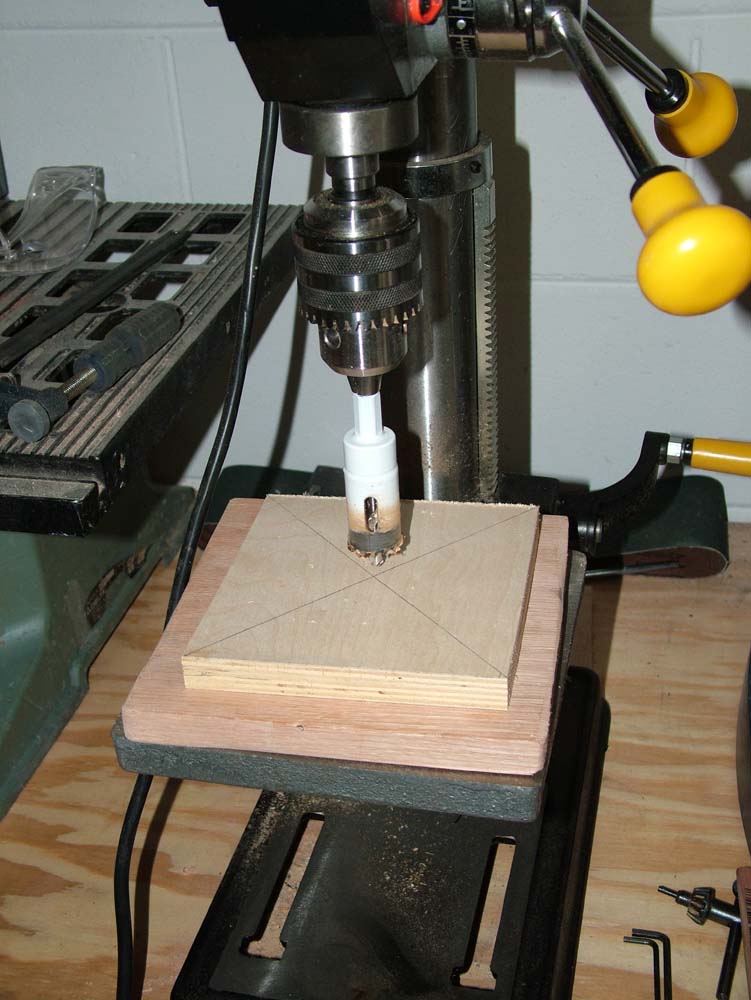
I drilled a 1" hole in each square of wood. |
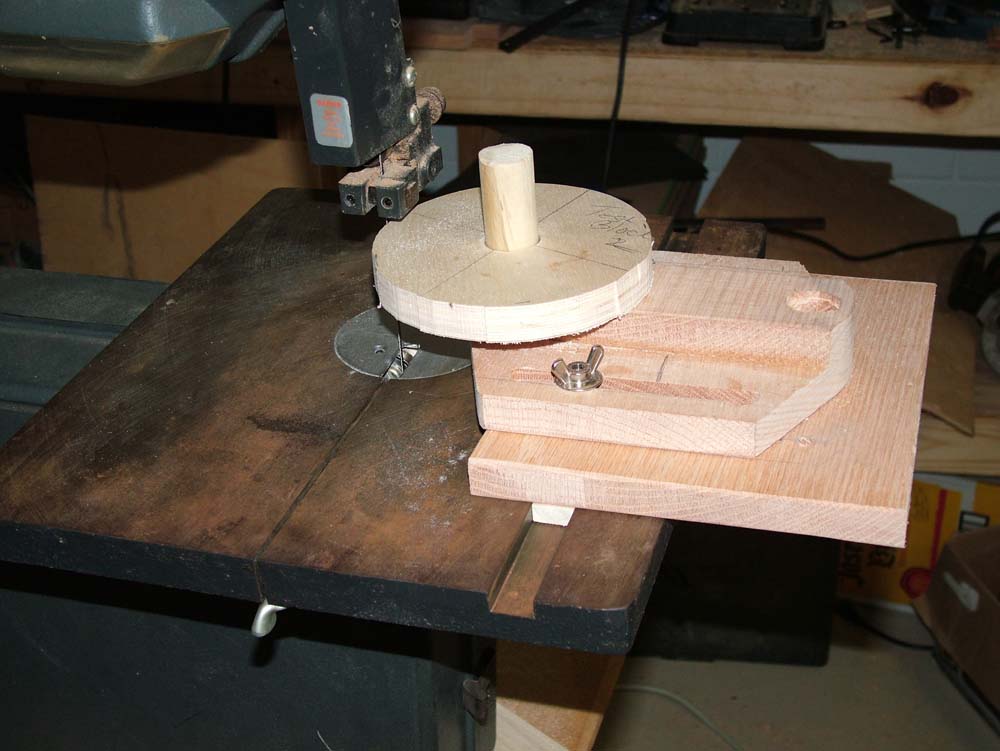
Here, I've cut a disk out of the square of wood. The sanding jig worked great. I make several cuts to round out the wood. When the disks are assembled, I will true them up on the sander base with course sandpaper. |
|
|
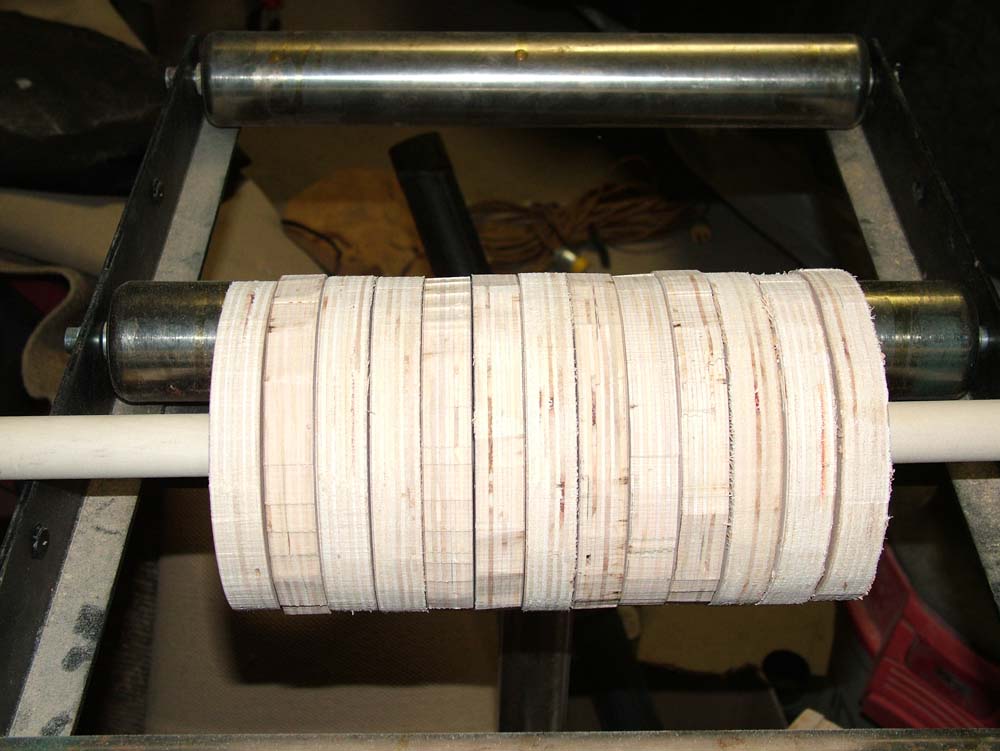
Here are about half of the disks that will be used to make up the sanding drum for the thickness sander. You can see that they are not all exactly the same diameter yet. |
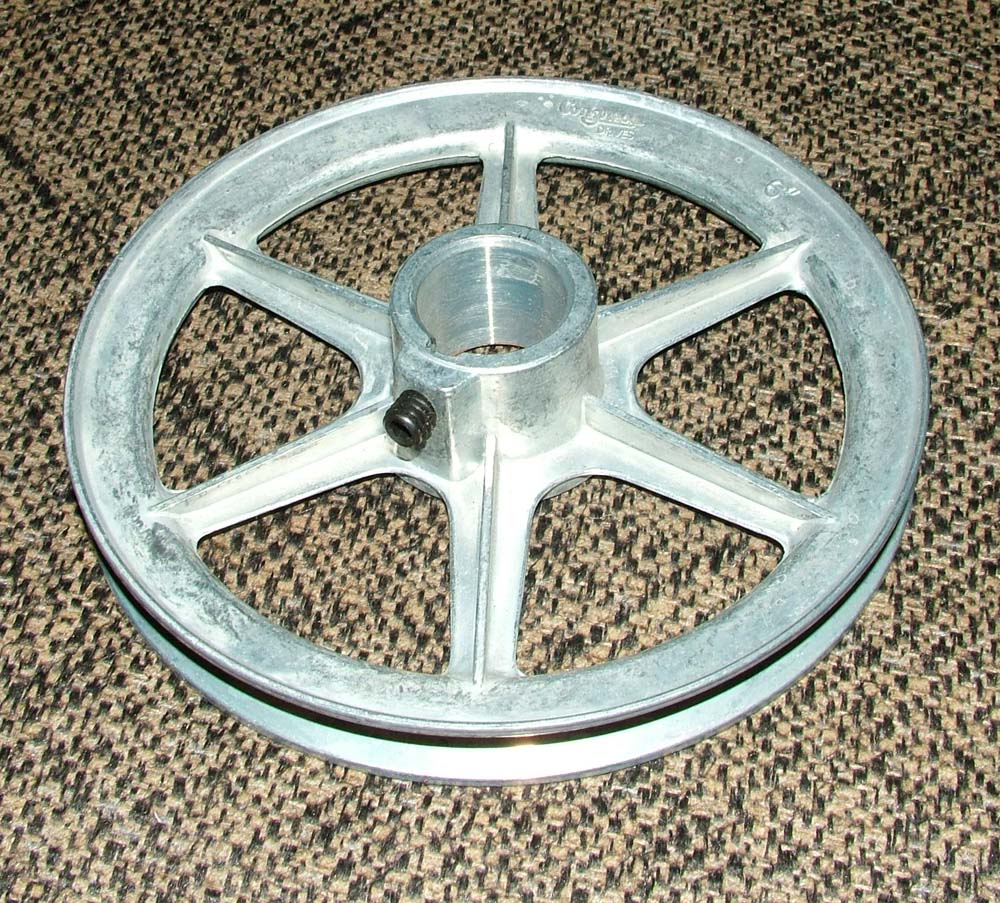
The plans for the thickness sander show how to make your own pulley out of plywood. This one from Grainger only cost around $15. |
Next, I will trim the edges of the table and cut a notch for a steel insert where the level adjustment screw will make contact with the table. I will use my Black & Decker rotary tool (like a Dremel) with my Craftsman plunge router attachment. When I looked into the plunge router attachment, it looks like Sears has discontinued this piece of equipment. Luckily, I was able to find one, like new, one Ebay. I will use this tool to do my inlays on the guitar also.
|