Thickness Sander
Page 7
Page 1 2 3 4 5 6 7 8 9
|
|
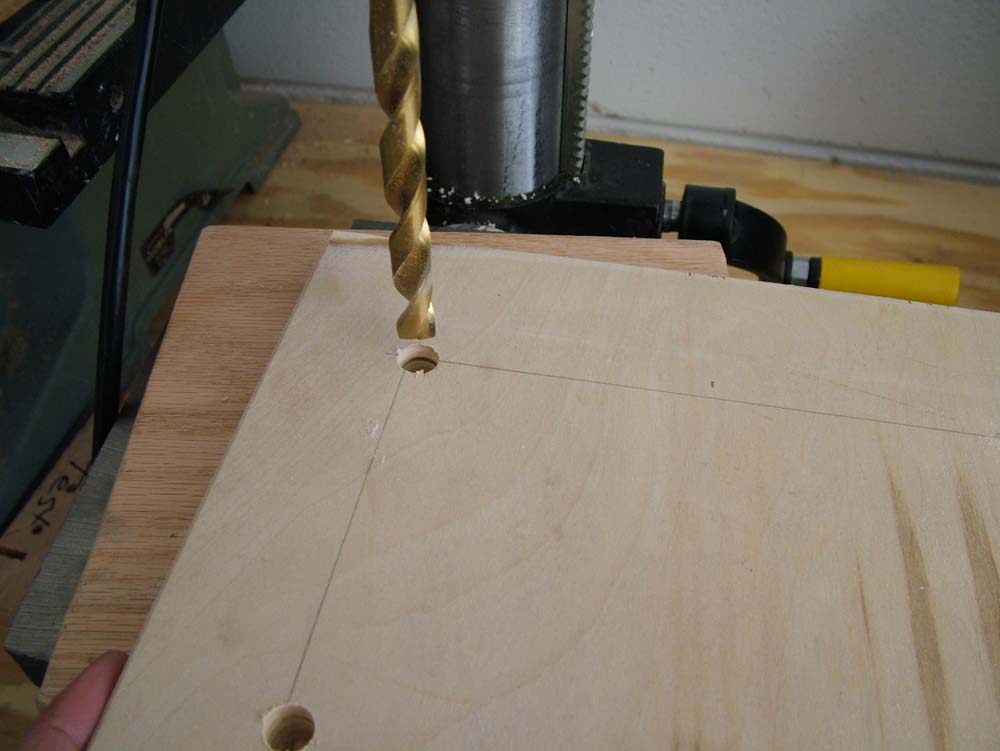
I cut the motor mount from 3/4" plywood and here I am drilling the holes to mount the 1 horsepower motor. |
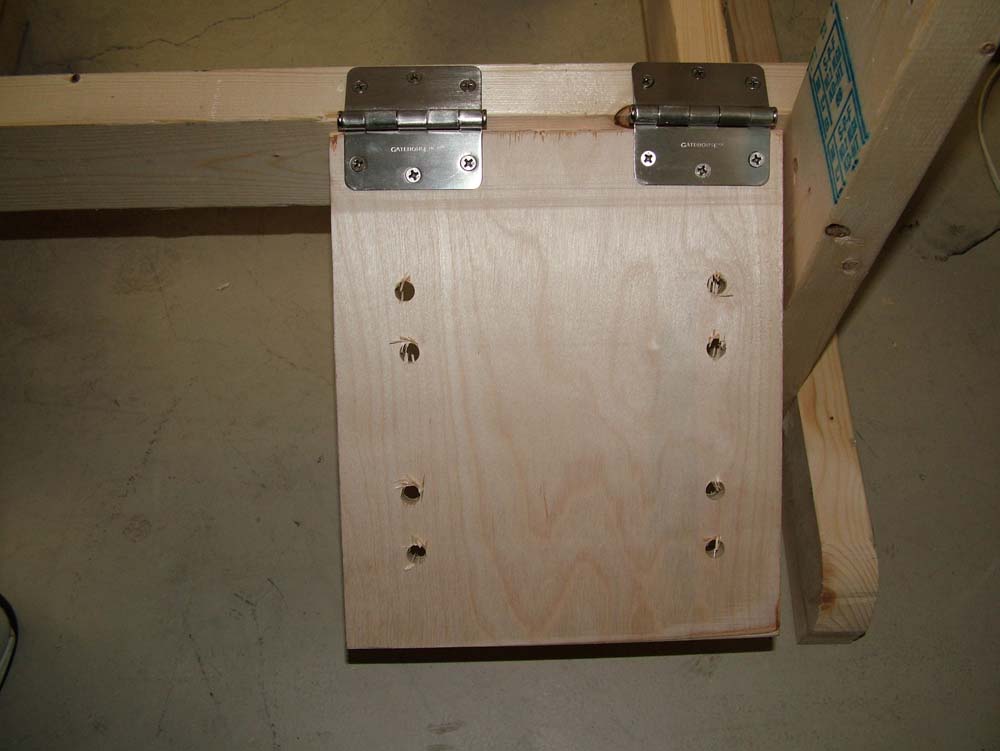
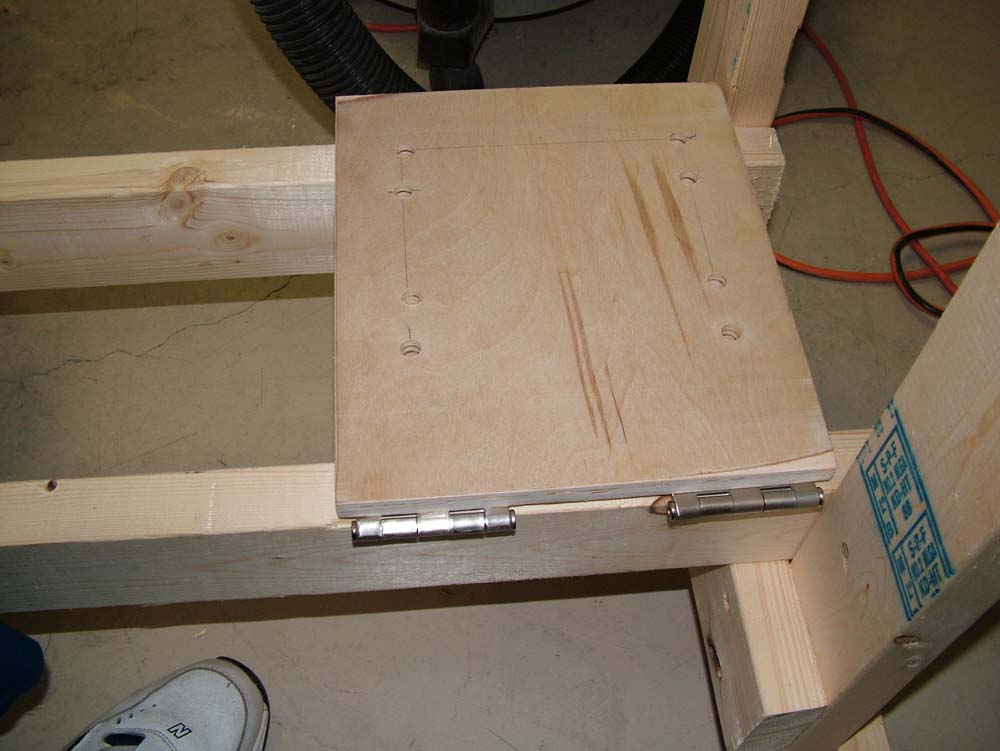
The mount for the motor is attached and holes drilled for the motor. The weight of the motor will provide tension to the V-belt. |
|
|
This is how the mount sits on the frame, across the frame braces. |
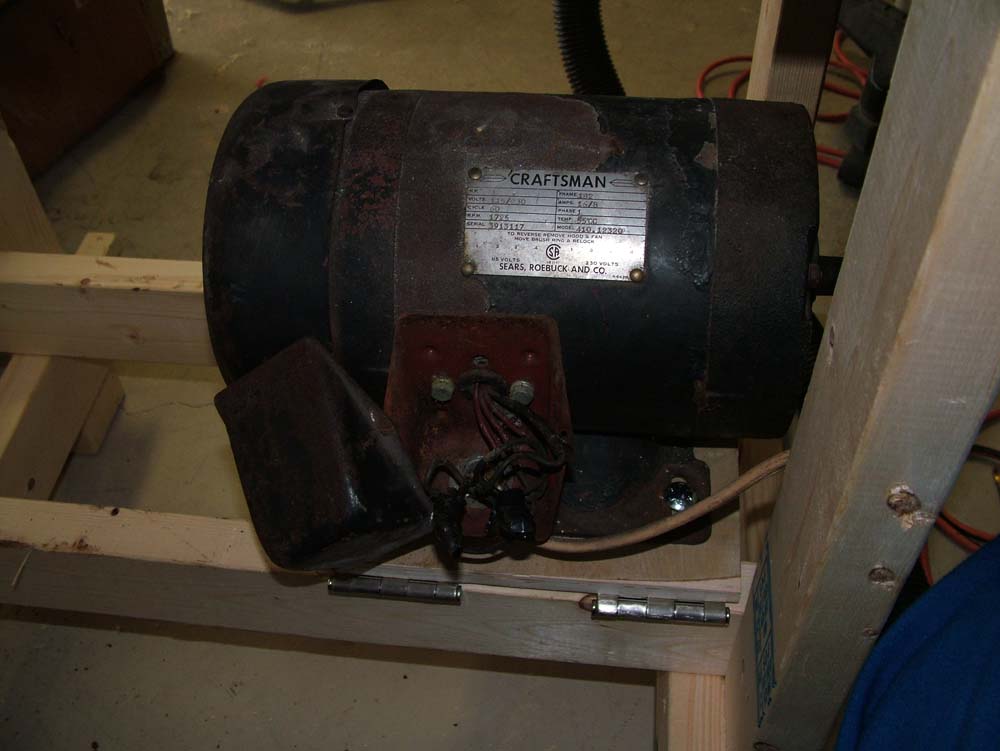
Here is the 1 horsepower motor I'll be using. It had a very old wire and plug that was only about 18" long. I changed that out but have some kind of short that I will have to find. |
|
|
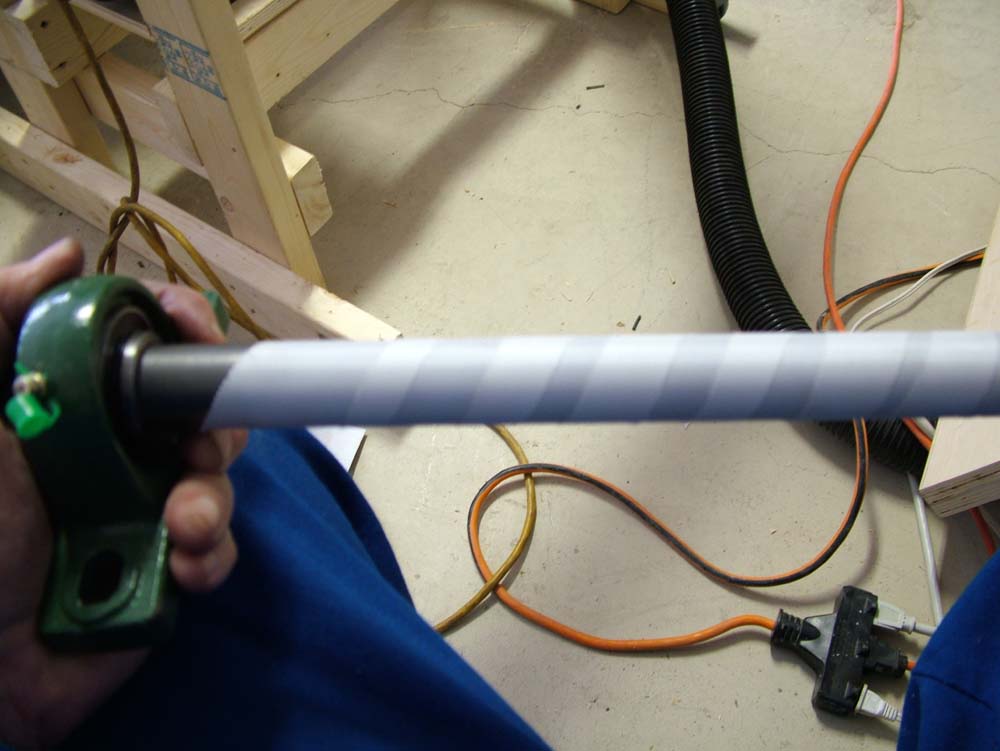
The holes in my wooden disks that make up the sanding drum are a little larger than the shaft. I wrapped the area where the drum will go with cloth medical tape. |
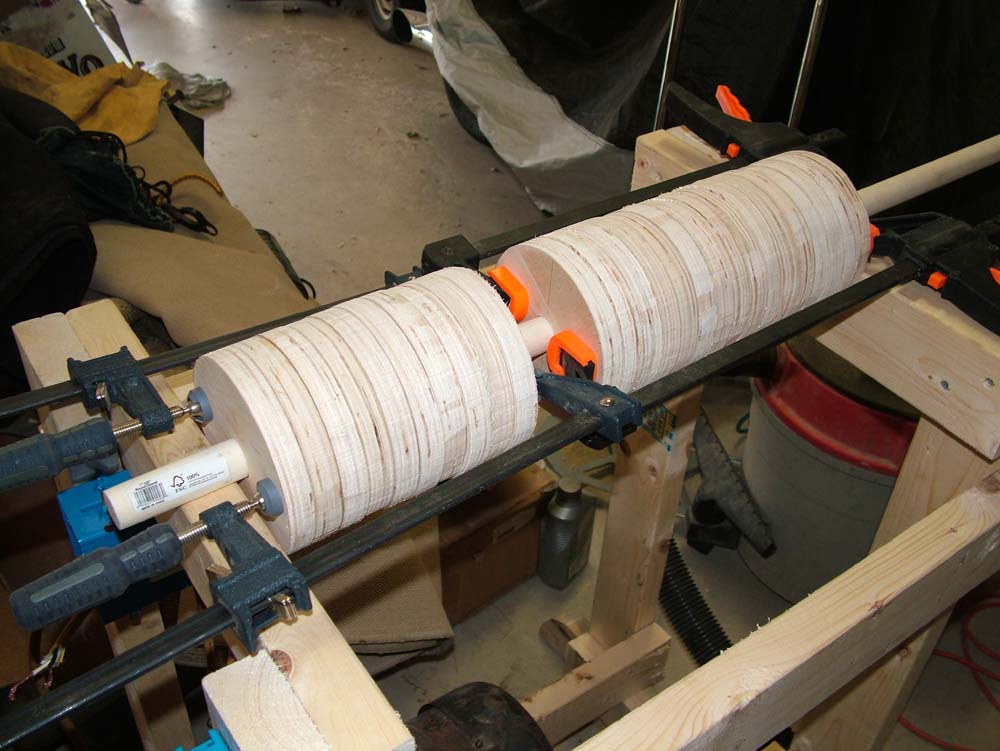
The disks are glued together in five groups of five. I clamped them and allowed them to dry on a 1" dowell. |
|
|
Another shot of the disks while the glue is drying. |
|
Today I built the motor mount for the sander. When I measured and drilled the holes for the motor, I drilled them 90 degrees off. I ended up having to drill more holes. I really should have thought it out a little more before actually drilling. I had bought some carriage bolts that ended up being too big to fit into the mounting bracket on my 1 horsepower motor so I made another trip to Ace Hardware to get the right bolts. I also got some lag screws to mount the pillow bearings. I also bought some contact cement and sandpaper. I will make a board the same width as the table on the sander and use the contact cement to glue the sandpaper to it. Then, I will use that board and the sandpaper to "true up" the sanding drum.
The motor I bought used, had an old cord that was only about 18" long. I took the cover off the motor and pulled that wire out and put a longer cord in. I bought a light switch and box today plus I bought an electrical outlet that I want to mount on the sander too. When I wired the outlet, the light switch and the motor, apparently I got something wrong because I had a big flash when I tested the circuit. It seems to be where I wired the motor so I will have to search that out and see where I made a mistake. My wire will come into the electrical plugs, then over to the on/off switch and then to the motor. Pretty simple so I'll have to troubleshoot.
After I got the motor mounted, I realized I had put it on the wrong side of the sander. Oh man! I can't believe I did that. So, I took the motor and the motor mount off. I repositioned the motor mount and redrilled for the hinges. Then I re-installed everything like it should be.
I was reading on the Luthiers Forum that the original builder of this sander didn't have any trouble mounting the wooden disks that make up the sanding drum onto the drum shaft. I've always heard that hole saws are not exactly the exact size they say they are. Sure enough the holes I drilled in my disks are slightly larger than the 1" o.d. shaft I am using. I bought some cloth medical tape at the local CVS drug store and wrapped the area where the drum will go. Two wraps is too much, making it almost impossible to get the disks on. I will have to stick to one layer of tape. I will trim the tape where it is only underneath the sanding drum.
I glued the disks as it shows in the plans for the sander. They recommend gluing the disks in five groups of five disks. Leave a small space between each group for cooling and expansion. I put the disks on a 1" dowell and clamped them while they dry.
Lastly, I mounted the sanding table. My table is about an inch longer than shown on the plans. I was going to trim that extra material off but after looking at the table, I think I will leave it. It will give me just a little more space to work with. Next I will troubleshoot my electrical problem and then begin building the dust hood. Once I get the motor going and get the dust hood built, I will be ready to "true up" the sanding drum. After that, I can start building a guitar!
Alas, I cannot sleep even after taking Lunesta! I slid the disks onto the drum shaft and two of the five sets fit rather tightly so I had to remove the cloth medical tape. I will use epoxy on the other two after wiping the shaft down with electrical contact cleaner to remove any oil. Then I will lightly sand the shaft where I will be putting the epoxy. This should hold the disks in place long enough to "true up" the drum. When the Velcro is wrapped around the drum it will help hold everything together too.
|